The Configuration Editor is divided into various areas. The respective configuration view determines what will be visible, what functions will appear in the profile tree, list of profile elements or in the assignment area.
Areas and Displaying Entries
The Configuration Editor is divided into various areas.
Structure of the Configuration Editor

Profile Tree
The model's profile structure is shown in the left-hand area of the Configuration Editor, the profile tree.
List of Profile Elements
The list of profile elements is shown for the Stereotypes, Type Systems (only relevant for Innovator for Information Architects), Templates, Actions and Documentation configuration views.
The profile elements created are shown for the profile element selected in the profile tree. The name and type of these profile elements are shown in the list's columns.
Assignment Compartment
The Assigned and Not Assigned assignment compartments are shown for the Relationships, Verification Routines, Documentation Structures, Execution Rights and Menus configuration views.
A drop-down list can be found above each area respectively.
- Constraints for Relationship Role (Relationships view)
- Menu (Menus view) or
- Menu command (Execution Rights view) or
- Chapter (Documentation Structures view).
The assignment areas in the Relationships view are called Allowed and Not Allowed.
The allowed and not allowed profile elements are shown for the profile element selected in the profile tree.
You can deactivate the View>Imported Entries toggle command to restrict the selection on the right-hand side to the entries defined in the current profile in these three-part views.
Result Region
You can only view precisely one profile element's subordinate entries in the list of profile elements. However, for some tasks you require a collection of elements, regardless of the profile element in which they are contained (for example, search for elements with certain properties within a profile).
You can collect, select and use as many elements of the profile as required in the Result Region.
Information about the element is also shown in columns in the result region, as with the list of profile elements.
You can show and hide the result region separately in the View menu or with the corresponding  icon. You can set the result region so that it is automatically shown as soon as an element is assigned in the Extras/Options dialog using the Automatically Show Result Region check box.

Configuration Views
You can choose from various views in the configuration views in the Configuration Editor. These consist of the profile tree on the left-hand side and, depending on the view, either the list of profile elements or the assignment compartments in the area on the right-hand side.
The order of views is structured according to the flow when configuring (Sehen Sie hierf�r: "Figure: Procedure When Editing a Configuration").
Note
If you change the view, the selection in the profile tree is lost; this happens as the profile elements selected so far are not shown in this view.
The View><Configuration View> menu commands (jumps view) is deactivated precisely when the Edit/Search or Jump/Reference dialogs are opened; this is because they are dependent on the view.
 Stereotypes View
All stereotype-dependent profile elements are created and edited in the Stereotypes configuration view.
It shows the profile's structure with stereotypes structured in the profile sections in the profile tree on the left-hand side (the latter corresponds to the UML 2's M2 packages).
Depending on the selection made in the profile tree, you can see the following in the list of profile elements on the right-hand side:
- The profile which is currently loaded, if the root node is selected (corresponds to the mode)
- The profile sections contained, if a profile is selected
- The element types contained in it, if a profile section is selected
- Stereotypes, text and label definitions, primitive, filter and file extensions stored in the element type, if an element type is selected
- Text definition, font/color elements and labels if the General or other Innovator-specific profile elements are selected
- The stereotype properties and type system options if a stereotype is selected or
- The pre-defined values of enumerations if a stereotype property, a type system option or label definition is selected
Define the stereotypes and their stereotype properties or type system options, including the primitive types and selection filters, in the Stereotypes view. Stereotype-precise Innovator elements, such as specification texts, font/color elements and labels are also set here.
 Sync State View
Synchronization profiles are created and edited in the Sync State configuration view. You can define a synchronization set with synchronous properties to simplify management of element properties which exist in various method contexts with corresponding differing stereotypes. Model elements based on these are automatically synchronized.
The view shows the synchronization profile's structure with the imported profile's stereotypes in the profile tree on the left-hand side; these are structured in profile sections.
Depending on the selection made in the profile tree, you can see the following in the list of profile elements on the right-hand side:
- The current synchronization profiles, if the root node is selected
- The profile sections contained, if a synchronization profile is selected
- The root stereotypes contained in it, if a profile section is selected
- The synchronization sets contained in it, if a stereotype is selected
Create the synchronization set in the Sync State view and define the synchronized stereotype properties and synchronization properties in their properties.
Further Information
 Relationships View
The Relationships configuration view shows the stereotype in relation to other stereotypes. The profile tree on the left-hand side shows the profile's structure with the individual profile sections.
Select the relationship role which you want to set stereotypes which are allowed for it in the assignment compartment's drop-down list.
Possible relationship roles of the metamodel include:
- Owner or assigned elements (can be configured for all element types)
- Target (for all directed relationships) or incoming relationship (all, apart from structure diagrams, expressions, comments, behavior conditions)
- Typed element (all classifiers) or type (all typable elements)
- Diagram contents (all diagrams) or diagram (all elements which can be shown by a node or edge in the diagram)
The stereotypes which are allowed and not allowed are listed for the various relationship roles of the stereotype selected in the profile tree on the left-hand side in the assignment compartment.
You can deactivate the View>Imported Entries toggle command to restrict the selection on the right-hand side to the entries defined in the current profile in this view.
Further Information
 Type Systems View
You can maintain the options for relational database systems in the Type Systems configuration view (only relevant for Innovator for Information Architects). You can create data types and options, as well as mappings between data types of various type systems.
The Type Systems view shows the profile's structure with the existing type systems and their respective data types and options in the profile tree on the left-hand side.
You can see the elements created or imported in the list of profile elements on the right-hand side by selecting a data type or option.
 Templates View
You can create templates in the Templates configuration view. The settings made in the Stereotypes and Relationships views are then used in the templates properties.
The Templates view shows the profile's structure with the profile section's stereotypes in the profile tree on the left-hand side.
You can see the assigned create templates in the list of profile elements on the right-hand side when you select a stereotype. Create templates are used for configuring defaults when creating a model template in the Innovator model or in the diagram.
Further Information
 Verification Routines View
You can create verification routines in the Verification Routines configuration view. The elements which the verification routines should apply for are selected in both the first levels (verification sections and verification categories). Stereotypes are selected for this element type in the third level. A fourth level then finally selects verify options (verification messages) for the stereotype. Assignment takes place using drag-and-drop between the assigned and not assigned areas.
The Verification Routines view shows the profile's structure with the verification routines created and the stereotypes checked by them (which are structured according to verification sections and verification categories) in the profile tree on the left-hand side.
Depending on the selection made in the profile tree, you can see the following in the assignment compartment on the right-hand side:
- The verification routine assigned to the profile, if a profile is selected
- The verification section assigned to the verification routine, if a verification routine is selected
- The verification category assigned to the verification section, if a verification section is selected
- The stereotype assigned to the verification category, if a verification category is selected
- The verification message assigned to the stereotype, if a stereotype is selected
The verification elements not assigned are also listed in the assignment compartment on the right-hand side.
You can deactivate the View>Imported Entries toggle command to restrict the selection on the right-hand side to the entries defined in the current profile in this view.
Further Information
 Actions View
The Actions configuration view manages engineering actions. You can configure Java program sequences and command sequences. The view shows the profile's structure with the profile section's engineering actions created in the profile tree on the left-hand side.
You can see the engineering actions created based on Java or C# programs in the list of profile elements on the right-hand side by selecting a profile.
Further Information
 Documentation Structures View
The Documentation Structures configuration view manages the documentation structure of the profiles and the configuration of the detail view in the Innovator model editor (details configuration).
It shows the profile's structure with the profile's documentation structures and subtree Details configuration created in the profile tree on the left-hand side.
The assignment of the chapter and documentation building blocks or the assignment of recursive model elements for the Details configuration respectively is shown respectively in the assignment compartment on the right-hand side.
You can deactivate the View>Imported Entries toggle command to restrict the selection on the right-hand side to the entries defined in the current profile in this view.
Further Information
 Documentation View
Use the Documentation configuration view for preparing documentation commands from documentation structures, title pages, headers, footers etc.
It shows the profile's structure with the documentation's profile sections in the profile tree on the left-hand side.
You can see the documentation's default profile section in the list of profile elements on the right-hand side by selecting a profile and its respective assignments and settings when selecting a profile section.
Further Information
 Execution Rights View
In the Execution Rights configuration view, you can assign the configured menu commands (create templates, verification routines, engineering actions, and documentation commands) to the user roles in order to define the right to execute these commands for the user roles in the relevant profile.
Execution rights for these menu commands do not need to be stored in the same profile with the command's definition; they can also be allocated to various profiles if required.
If the Adopt access rights from execution rights property is activated for a create template being used, then all roles with the execution right are also given the access right.
You can deactivate the View>Imported Entries toggle command to restrict the selection on the right-hand side to the entries defined in the current profile in this view.
Further Information
 Menus View
The Menus configuration view is used for assigning create templates, verify routines, engineering actions and documentation commands to respective menus in the Innovator model and in diagrams.
It shows the profile's structure with the profile section's diagram stereotypes as well as the Innovator model under Innovator-specific in the profile tree on the left-hand side.
The profile's respective submenus and/or the submenu's menu commands assigned and the entries not assigned are listed in the assignment compartment on the right-hand side.
You can deactivate the View>Imported Entries toggle command to restrict the selection on the right-hand side to the entries defined in the current profile in this view.
Viewing the Profile Structure in the Profile Tree
All of your model's profiles are shown in the profile tree. This means you can view your model's profile structure at a glance.
Profiles have a hierarchical structure. You can manage the tree structures which result from profile elements being created and assigned in the profile tree.
Demo Model Profile Tree (Example)
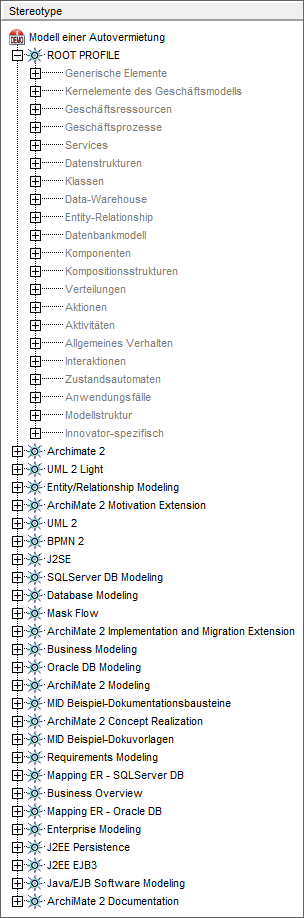
You can get the following information from the profile tree:
-
The top-most node in the tree structure represents the model itself. All of the model's profiles are stored in the root node .
The root node and base profile cannot be deleted in the Configuration Editor.
Renaming the root node also changes the model name. You cannot rename the base profile.
-
Any number of profiles can be stored under the root node along with the obligatory base profile.
Each of these elements can, in turn, have other sub elements and, in doing so, form the root of a subtree.
-
Profile elements can be associated with an icon using their stereotype . This icon is displayed before the profile element's name.
Using the List of Profile Elements
The name and type of the profile elements stored are shown in the list's columns.
Using Information in the Columns
A multitude of information is stored for the majority of profile elements. You can view the following information directly in the Configuration Editor using the list of profile elements:
-
Number
All of a profile's elements are serially numbered. The order cannot be changed and is taken from the OMG specification or is alphabetic. You can change the order of the profiles.
You can also change the order of labels, texts, stereotype properties and type system options below a stereotype. The order then specifies the order in which the elements should be listed in the dialogs. You can also change the order of enumerations of labels, stereotype properties or type system options. This also sets the order in the dialogs here.
-
Name
Name of profile element. You can change the name of profile elements which were created by a user.
-
Type
Type of profile element. The type cannot be changed.
Creating Profile Elements
You can create profile elements using the Create menu. Certain prerequisites must be fulfilled before creating profile elements. As the profile is subject to the user concept, i.e. access rights and locking, you e.g. always need to lock the profile to be able to create new profile elements.
Due to where the profile elements are stored within the profile structure, they can only be created in a certain view and through certain selections.
Changing the Order of Profiles
Context
The profiles in the list of profile elements are arranged in the order in which they were created as standard. You can change the order of the profiles. The order is saved.
Note
The order of the profiles influences the order of the menu commands in the Innovator model editor and in diagrams: commands from profiles above are listed before profiles below these ones.
How to proceed
-
Lock the model (the root node).
-
Click on the column head of the column which contains the numbered entries to sort them according to their current position in the model.
-
Click on the profile in the list of profile elements whose position you want to change and drag it to the correct position keeping the mouse button pressed.
The order of the entries and their numbering are adapted. If you have moved a profile, the order is also changed in the profile tree.
Sorting Entries in the List of Profile Elements
Context
You can sort the entries in the list of profile elements up or down according to the columns.
How to proceed
-
Click on the column heading of the relevant column.
The entries are sorted.
-
To reverse the sort order, click on the column head again.
Adopting the Current Sorting as Order
Context
You can adopt the current sorting as the order.
Attention
This process cannot be undone.
How to proceed
-
Lock the higher level (i.e. the model needs to be locked when resorting profiles and the profile needs to be locked when resorting labels).
-
Select the View>Adopt sort order menu command.
The current sorting is adopted as the order. The numbering is adapted accordingly.
Using Assignment Compartments
You can assign profile elements using the Edit>Assign, Edit>Assign Recursively or Edit>Delete commands in the menu.
Tip
You can also easily move the profile elements between the Assigned and Not Assigned areas using drag-and-drop.
Certain prerequisites must be fulfilled before assigning profile elements. As the profile is subject to the user concept, i.e. access rights and locking, you e.g. always need to lock the profile to be able to assign profile elements. Due to where the profile elements are stored within the profile structure, they can only be assigned in a certain view and through certain selections.
