Mini Toolbar
The mini toolbar appear as well as the context menu for creating or typing diagram elements.
Purpose
The mini toolbar is used for creating and typing diagram elements. Depending on the size of the window, it appears above or below the context menu of a selected diagram element.
Structure
The mini toolbar contains icons for creating certain elements that you can directly assign to the selected diagram element. The icons appear according to the configuration directly in or above the drop-down list. You can also access some or all icons using the Create Diagram Content gallery. This part of the bar is gray.
The mini toolbar also contains icons for typing the selected diagram element or one of its properties. You can assign or undo assignment by clicking on the respective icon. This part of the bar is white. The type properties of the element are updated accordingly in the Properties tool window. It is also possible to modify properties directly there.
The mini toolbar may be split to the width of the context menu for many entries.
Each icon has a tool tip that gives information about the property or type.
Examples
Mini Toolbar for a Class
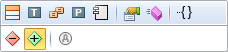
You can select the icon for the element (node), property (property) or expression that you want to directly assign to the selected class from the top rows of the mini toolbar (here: class, data type, enumeration type, primitive type, component, attribute, operation, condition)
The assigned element and a member relationship from the selected to the new element are created when a new element is assigned. New compartment entries (attribute or operation) are created when a property is assigned. The constraint and a link to the selected element are created when a global condition is assigned.
Select the icon for the property of the class you want to activate or deactivate in the bottom row of the mini toolbar (here: visibility, 'Is Abstract Classifier'). The class properties are updated accordingly in the Properties tool window. It is also possible to modify properties directly in the class' properties.
Mini Toolbar for a Task
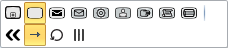
Select the icon for the task type and (right of the separator) the execution type in a task's mini toolbar.
The task becomes a call activity if you select the plus sign icon. If you select another icon, the corresponding BPMN task type is set and the marker is shown in the task icon. Select the empty task icon  in the mini toolbar to reset the selection (no type).
Select the icon for the execution type (loop properties type) you want to the right of the separator. The corresponding icon is shown in the flow node. Select the icon  in the mini toolbar to reset the selection (no type).
The task properties are updated accordingly in the Properties tool window. It is also possible to modify the task type or the execution type directly in the task's properties.
Mini Toolbar for a Subprocess
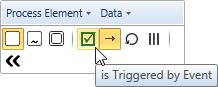
You can select the icon for the process element or the data that you want to directly assign to the selected subprocess from the top rows of the mini toolbar.
The assigned element is embedded in the subprocess when a new process or data element is assigned and the subprocess is extended accordingly.
Select the icon for the sub process type in the bottom left-hand part of the mini toolbar. Select the icon  in the mini toolbar to reset the selection (no type).
Select the icon for the execution type (loop properties type and trigger type) in the bottom right-hand part of the mini toolbar. Select the icon in the mini toolbar to reset the selection (no type).
The sub process properties are updated accordingly in the Properties tool window. It is also possible to modify the sub process type or the execution type directly in the sub process' properties.
