This section contains information about setting-up Visual Studio 2022projects for implementing your own plug-ins and for debugging options.
Setting-Up a Project in Visual Studio
Context
You can set up a project in Visual Studio 2022 for implementing your own plug-ins for Innovator.
How to proceed
-
Start Visual Studio 2022.
-
Create a new project:
-
Use the WPF class library C# template.
-
It is a good idea to assign the project name following the Company name.Innovator.Plugin.Plug-in name pattern.
-
Select a local directory on your computer as a storage location; this is because Windows only has limited rights on a network which can lead to problems for plug-in development.
-
Create a solution directory and select a name for it, e.g. MyPlugins.
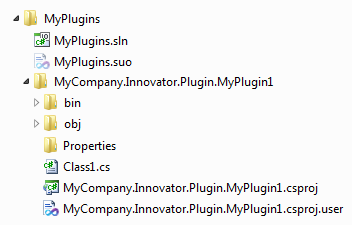
Following project creation, a structure similar to that of the plug-in samples should be in place: the project map (MyPlugins.sln) is in the directory for the plug-ins and each plug-in project is in its own subdirectory.
-
-
Open the project properties and select .NET 8.0 as the target framework.
-
Create a folder on your local hard drive and name it appropriately (e.g. c:\InoPlugins); this will be used as the root for storing translated class libraries. Each plug-in must be in its own directory below this root.
Note
The directory must have the same name as the class library due to technical reasons.
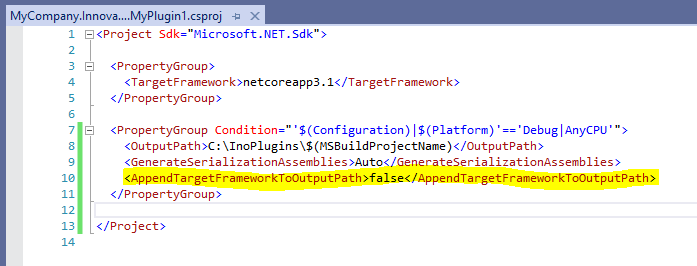
Set the output path in the Build tab in the project directories. Make sure that the project and class library names are identical so that you can use the MSBuildProjectName variable; this is C:\InoPlugins\$(MSBuildProjectName) in the example.
A net6.0-windows directory is created below the set output directory by default and the translated class library is stored here. Extend the project file as follows so that this will not happen:
-
Set the PLUGINS_PATH variable to the created root directory in the Administration Program in the Environment backstage view. The Innovator model editor will then load plug-ins from this directory.
-
Set the Start setting to Executable File in the Debug tab in the project properties and the start program to Innovator.exe in the directory with the installed Innovator programs.
-
Select the Dependencies node in the Project Maps Explorer tool window and run the Add COM Reference command via the context menu. You can open a dialog for referencing assemblies using the Search button. Jump to the directory with the installed Innovator programs and select:
-
Innovator .NET API
Innovator ApplicationFramework DLL
Innovator Windows DLL
Innovator Util DLL -
Actipro Ribbon (for Wpf)
Actipro Shared (for Wpf)
Attention
Set the Local Copy property to No in the properties for these references. The Innovator interface will not start with this plug-in if you do not do this.
-
-
Use the Class1.cs as the class which realizes IApplicationComponent and rename it accordingly, e.g. MyPluginComponent.
-
Extend the class definition to IApplicationComponent as the interface to realize:
public class MyPluginComponent: IApplicationComponent
-
Get Visual Studio to implement the interface.
The framework for an Innovator plug-in will then be complete and the plug-in can be compiled.
How to Proceed
The plug-in can then be directly started in the debugger in Visual Studio. Innovator.exe was entered as the start program for the debug settings; this starts the model editor and loads the plug-in in a model which then runs in the debugger.
Set a breakpoint to the RequestHandler method and start debugging. The model editor should then open. If you log-in to a model there and the debugger stops at the set breakpoint, then you know that the plug-in was set up correctly.
Attention
If you want to operate a plug-in with a higher Innovator version later on, the references to Innovator libraries and any ActiPro libraries must be updated and the plug-in project must be converted.
