Setting-Up a Project in Visual Studio
This section contains information about setting-up Visual Studio 2010 projects for implementing your own plug-ins.
-
Start Visual Studio 2010.
-
Create a new project:
-
Use Class Library as type.
-
It is a good idea to assign the project name following the Company name.Innovator.Plugin.Plug-in name pattern.
-
Select a local directory on your computer to save the project and not somewhere on the network. Windows may only assign it restricted rights if a directory is not stored locally on your computer; this could lead to problems when developing the plug-in.
-
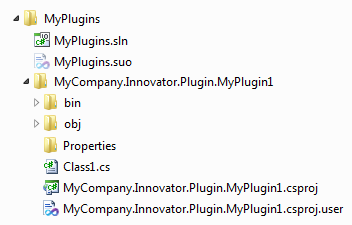
Create a solution directory and select a name for it, e.g. MyPlugins.
Following project creation, a structure similar to that of the plug-in samples should be in place: the project map (MyPlugins.sln) is in the directory for the plug-ins and each plug-in project is in its own subdirectory.
-
-
Open the project properties and select .NET Framework 4 Client Profiles as the target framework.
-
Set the output path in the Build tab in the project properties to your installed Innovator version's inoexe\Plugins directory.
Attention:Innovator should also be installed locally because of the same Windows security system reasons.
-
Set the start program (Start external program field) in the Debug tab in the project properties to Innovator.exe in the inoexe directory.
Note: These setting options are not available in the Visual Studio Express version.
-
Remove the Microsoft.CSharp reference in the project and enter the PresentationCore, PresentationFramework and WindowsBase .NET references.
-
Enter references for the following class libraries of the installed Innovator version.
-
MID.Innovator.API.dll
MID.Innovator.ApplicationFramework.dll
MID.Innovator.Windows.dll
MID.Innovator.Util.dll -
ActiproSoftware.Ribbon.Wpf.dll
ActiproSoftware.Shared.Wpf.dll
Attention:Set the Local Copy property to False in the properties for these references. The Innovator interface will not start with this plug-in if you do not do this.
-
-
Use the Class1.cs as the class which realizes IApplicationComponent and rename it accordingly, e.g. MyPluginComponent.
-
Extend the class definition to IApplicationComponent as the interface to realize:
public class MyPluginComponent: IApplicationComponent
-
Get Visual Studio to generate a using statement for IApplicationComponent.
-
Get Visual Studio to explicitly implement the interface.
The framework for an Innovator plug-in will then be complete and the plug-in can be compiled.
The plug-in can then be directly started in the debugger in Visual Studio Professional (or higher). Innovator.exe was entered as the start program for the debug settings; this starts the Innovator interface and loads the plug-in which then runs in the debugger. If breakpoints are set in the program code then it is run through until these points are reached.
Unfortunately, the Visual Studio Express version does not have the option of setting a start program for debugging in the interface. You can directly start Innovator.exe and run the plug-in but have to do without debugging. This is why the Professional version is preferable when developing plug-ins.